Tea Bag & Zine Booklet
A zine (/ziːn/ ZEEN; short for magazine or fanzine) is a small-circulation self-published work of original or appropriated texts and images, usually reproduced via photocopier. zine are the product of either a single person or of a very small group, and are popularly photocopied into physical prints for circulation.
Why Tea Bag?
Tea bags use environmentally friendly materials and can be used as a canvas for your artwork as well as a medium if it's used. Create your own tea bag in a bigger size.
Project Objectives
Apply in one single project the knowledge techniques learned in the class.
Intentionally explore form and content to communicate an idea, emotion and/or narrative through 2D Design.
Research and apply different medium and formats for artmaking.
Explore the creation, arrangement, installation and presentation .
Project Description
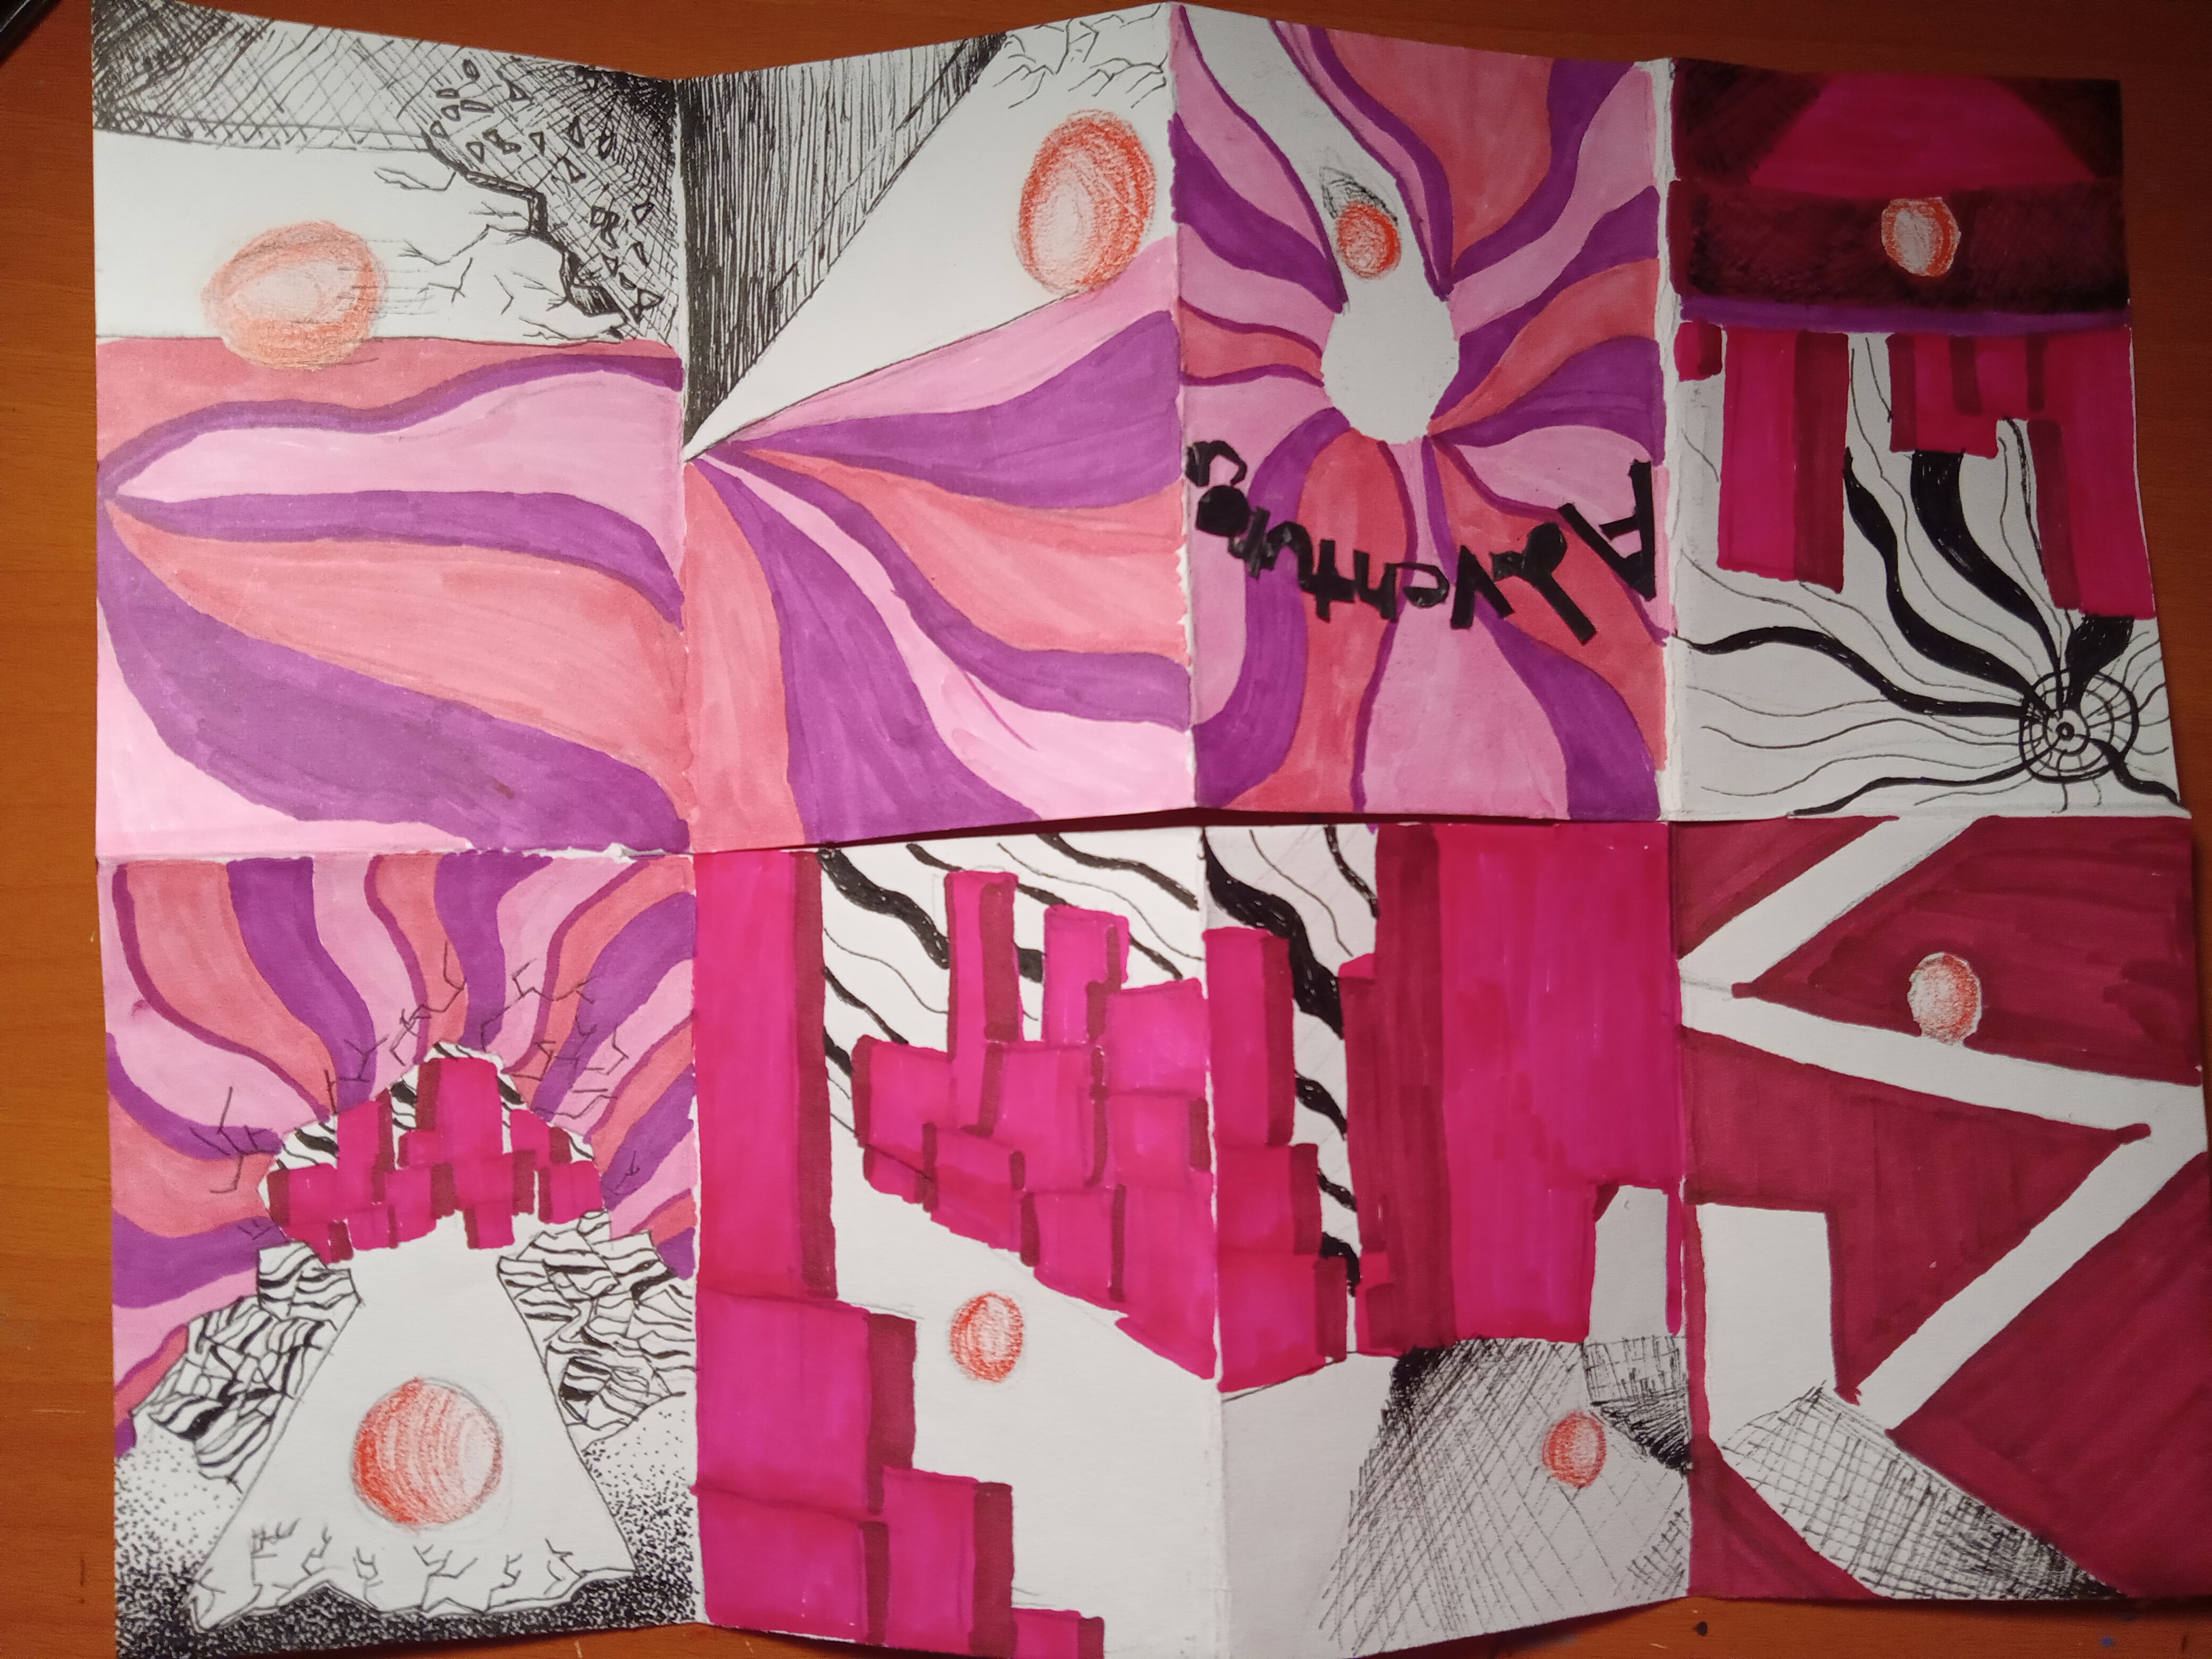
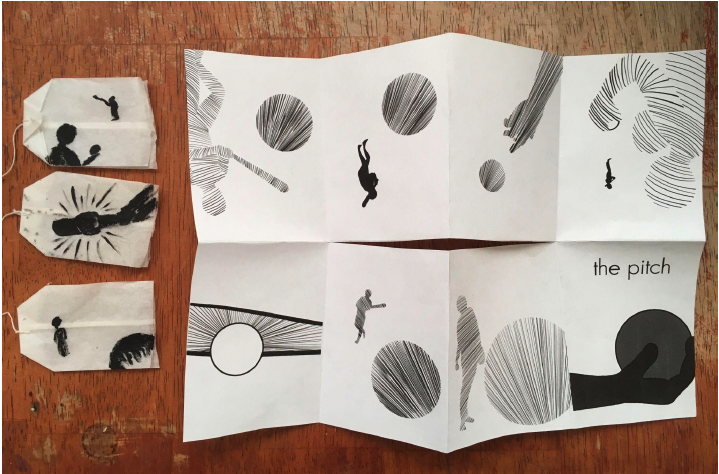
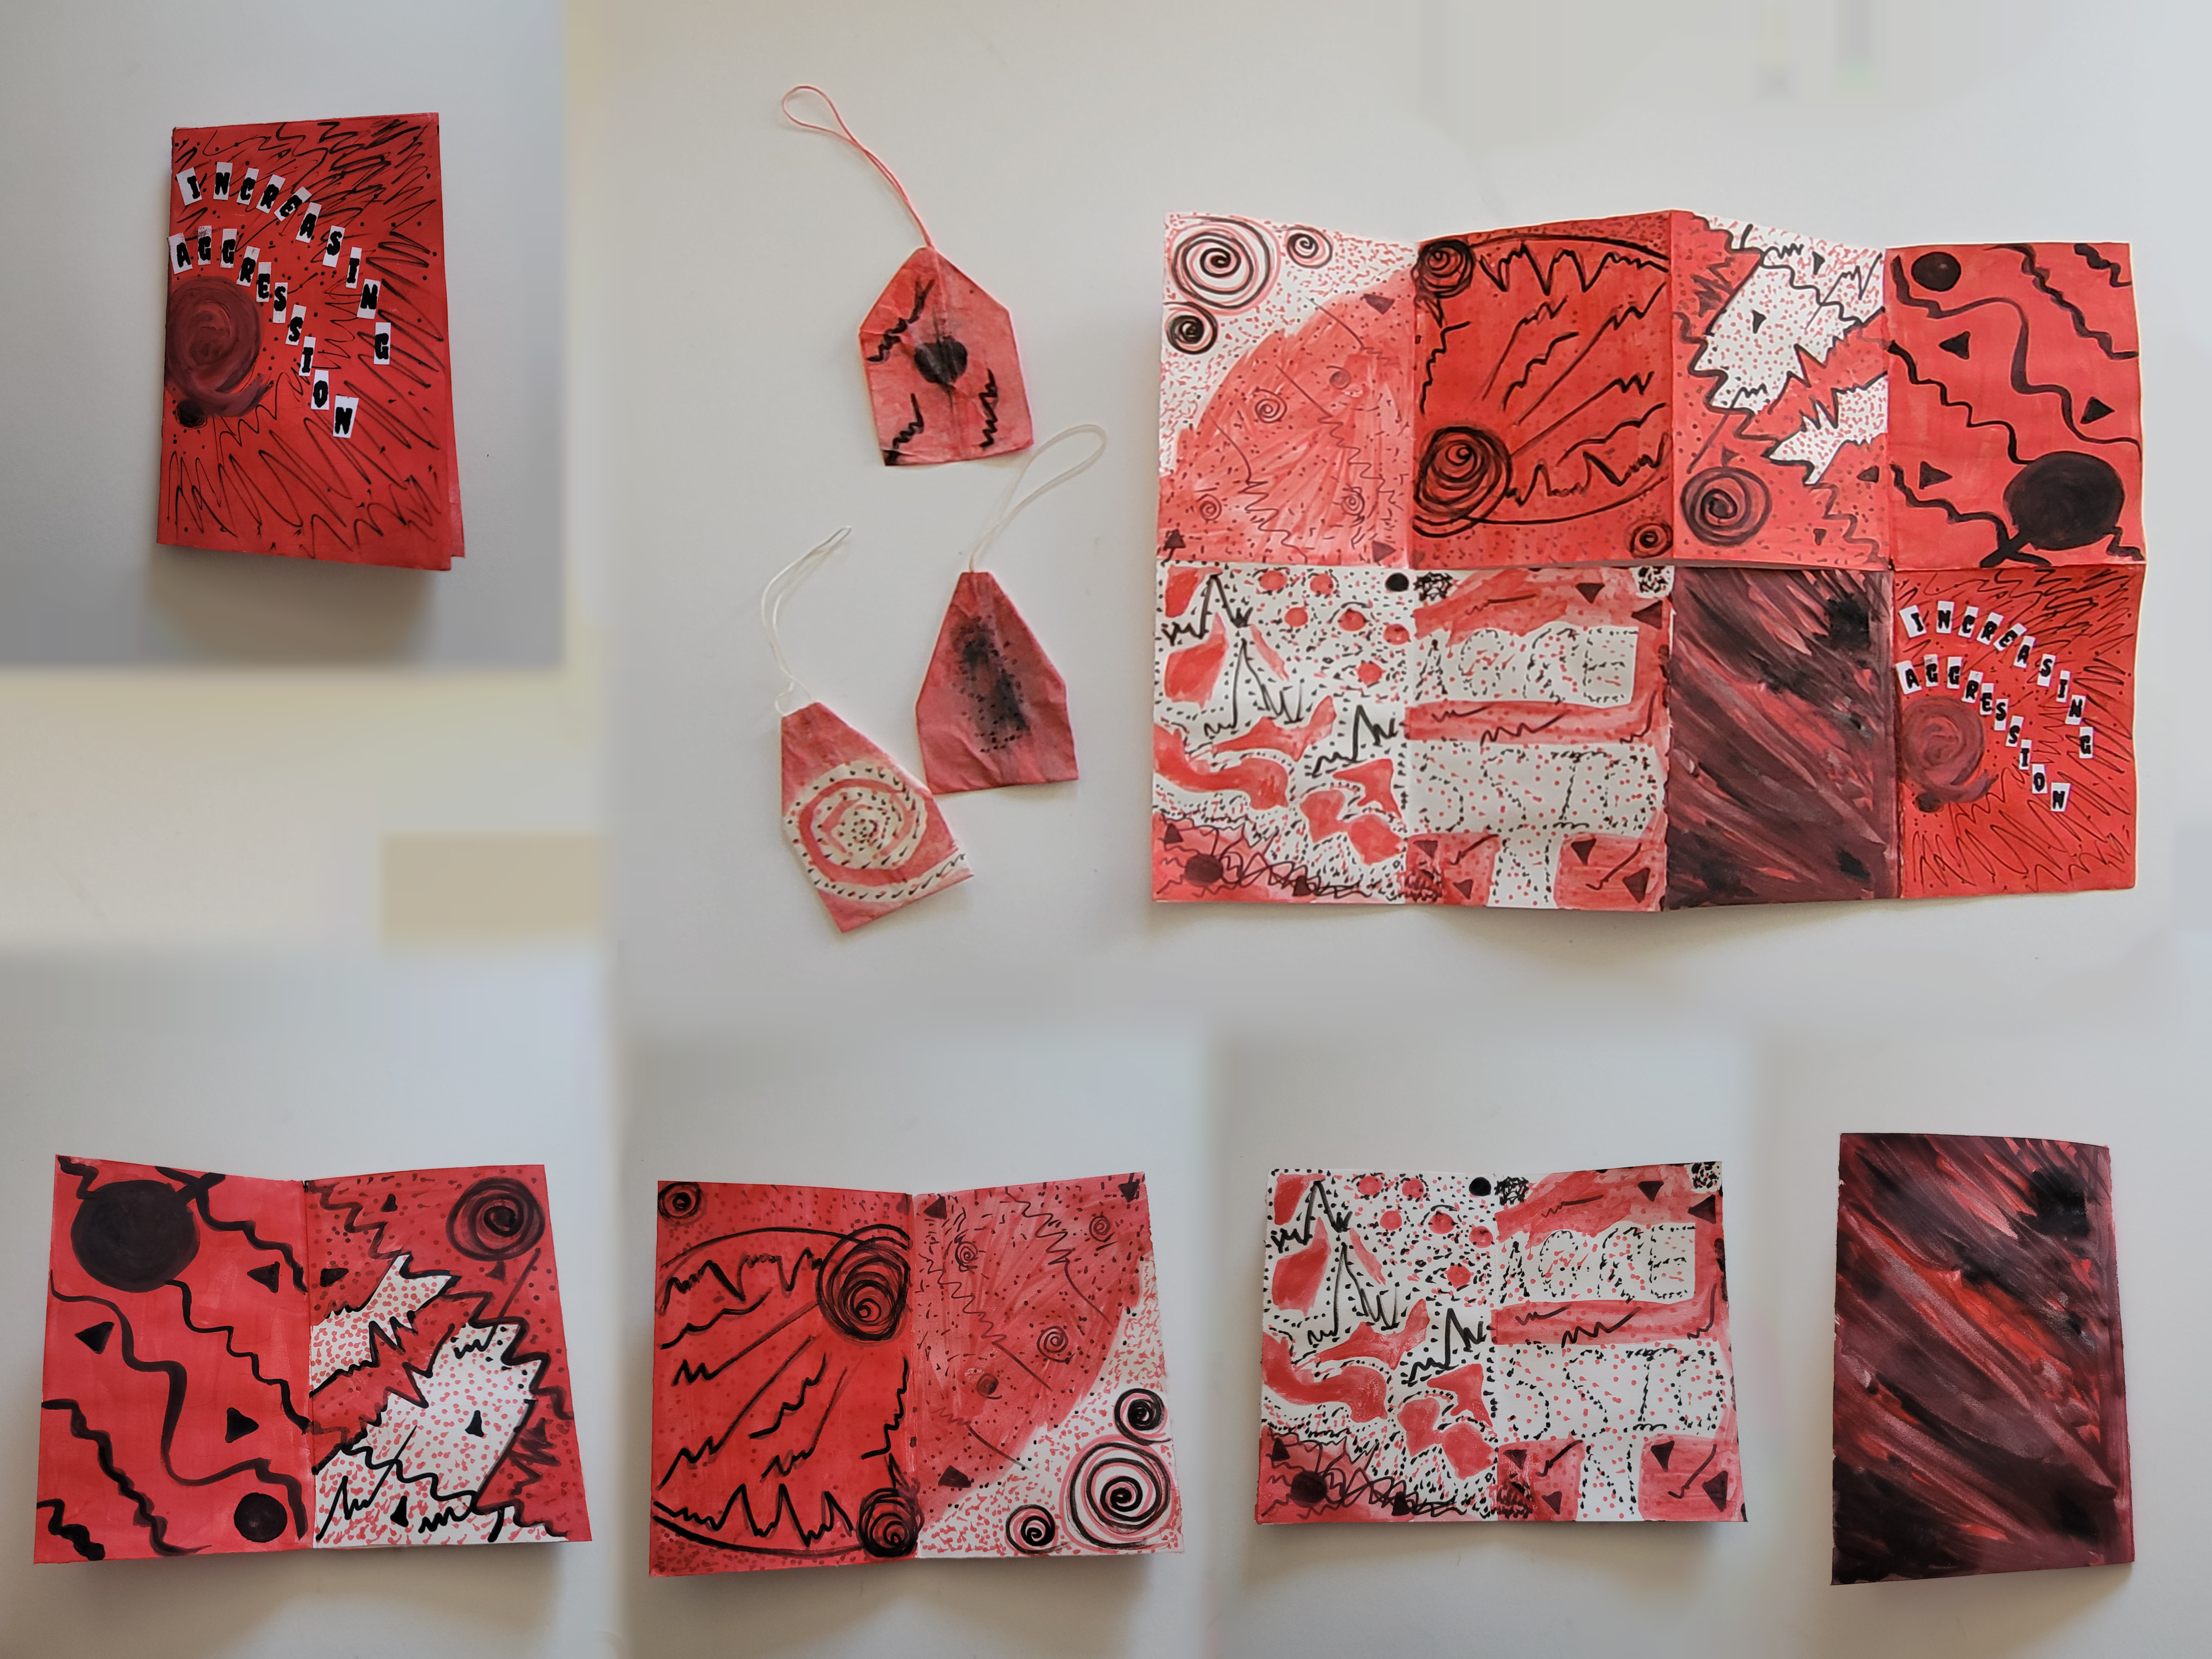
For this project, you will create two sets of One Zine Booklet with accompanying Three Tea Bags. The Zine booklet should utilize the formal elements and principles of design combined with the design of a tea bags following Part C of the project. We will explore how both form and content can be utilized together to communicate an idea, emotion, and narrative to your viewer. We will also explore the arrangement, presentation, and installation of the Tea Bags & Zine Booklet.
How can a two-dimensional image be utilized for self-expression?
How can it convey an emotion or idea to its viewer?
Required Materials
Drawing Paper, ArtAgain Paper, Bristol Board or Cardstock Paper Sketchbook Collage, Stamps &/or Paint Materials HB Mechanical Pencil Eraser Artist Tape Scissors Xacto Ruler Rubber Cement White Glue
Project Resources
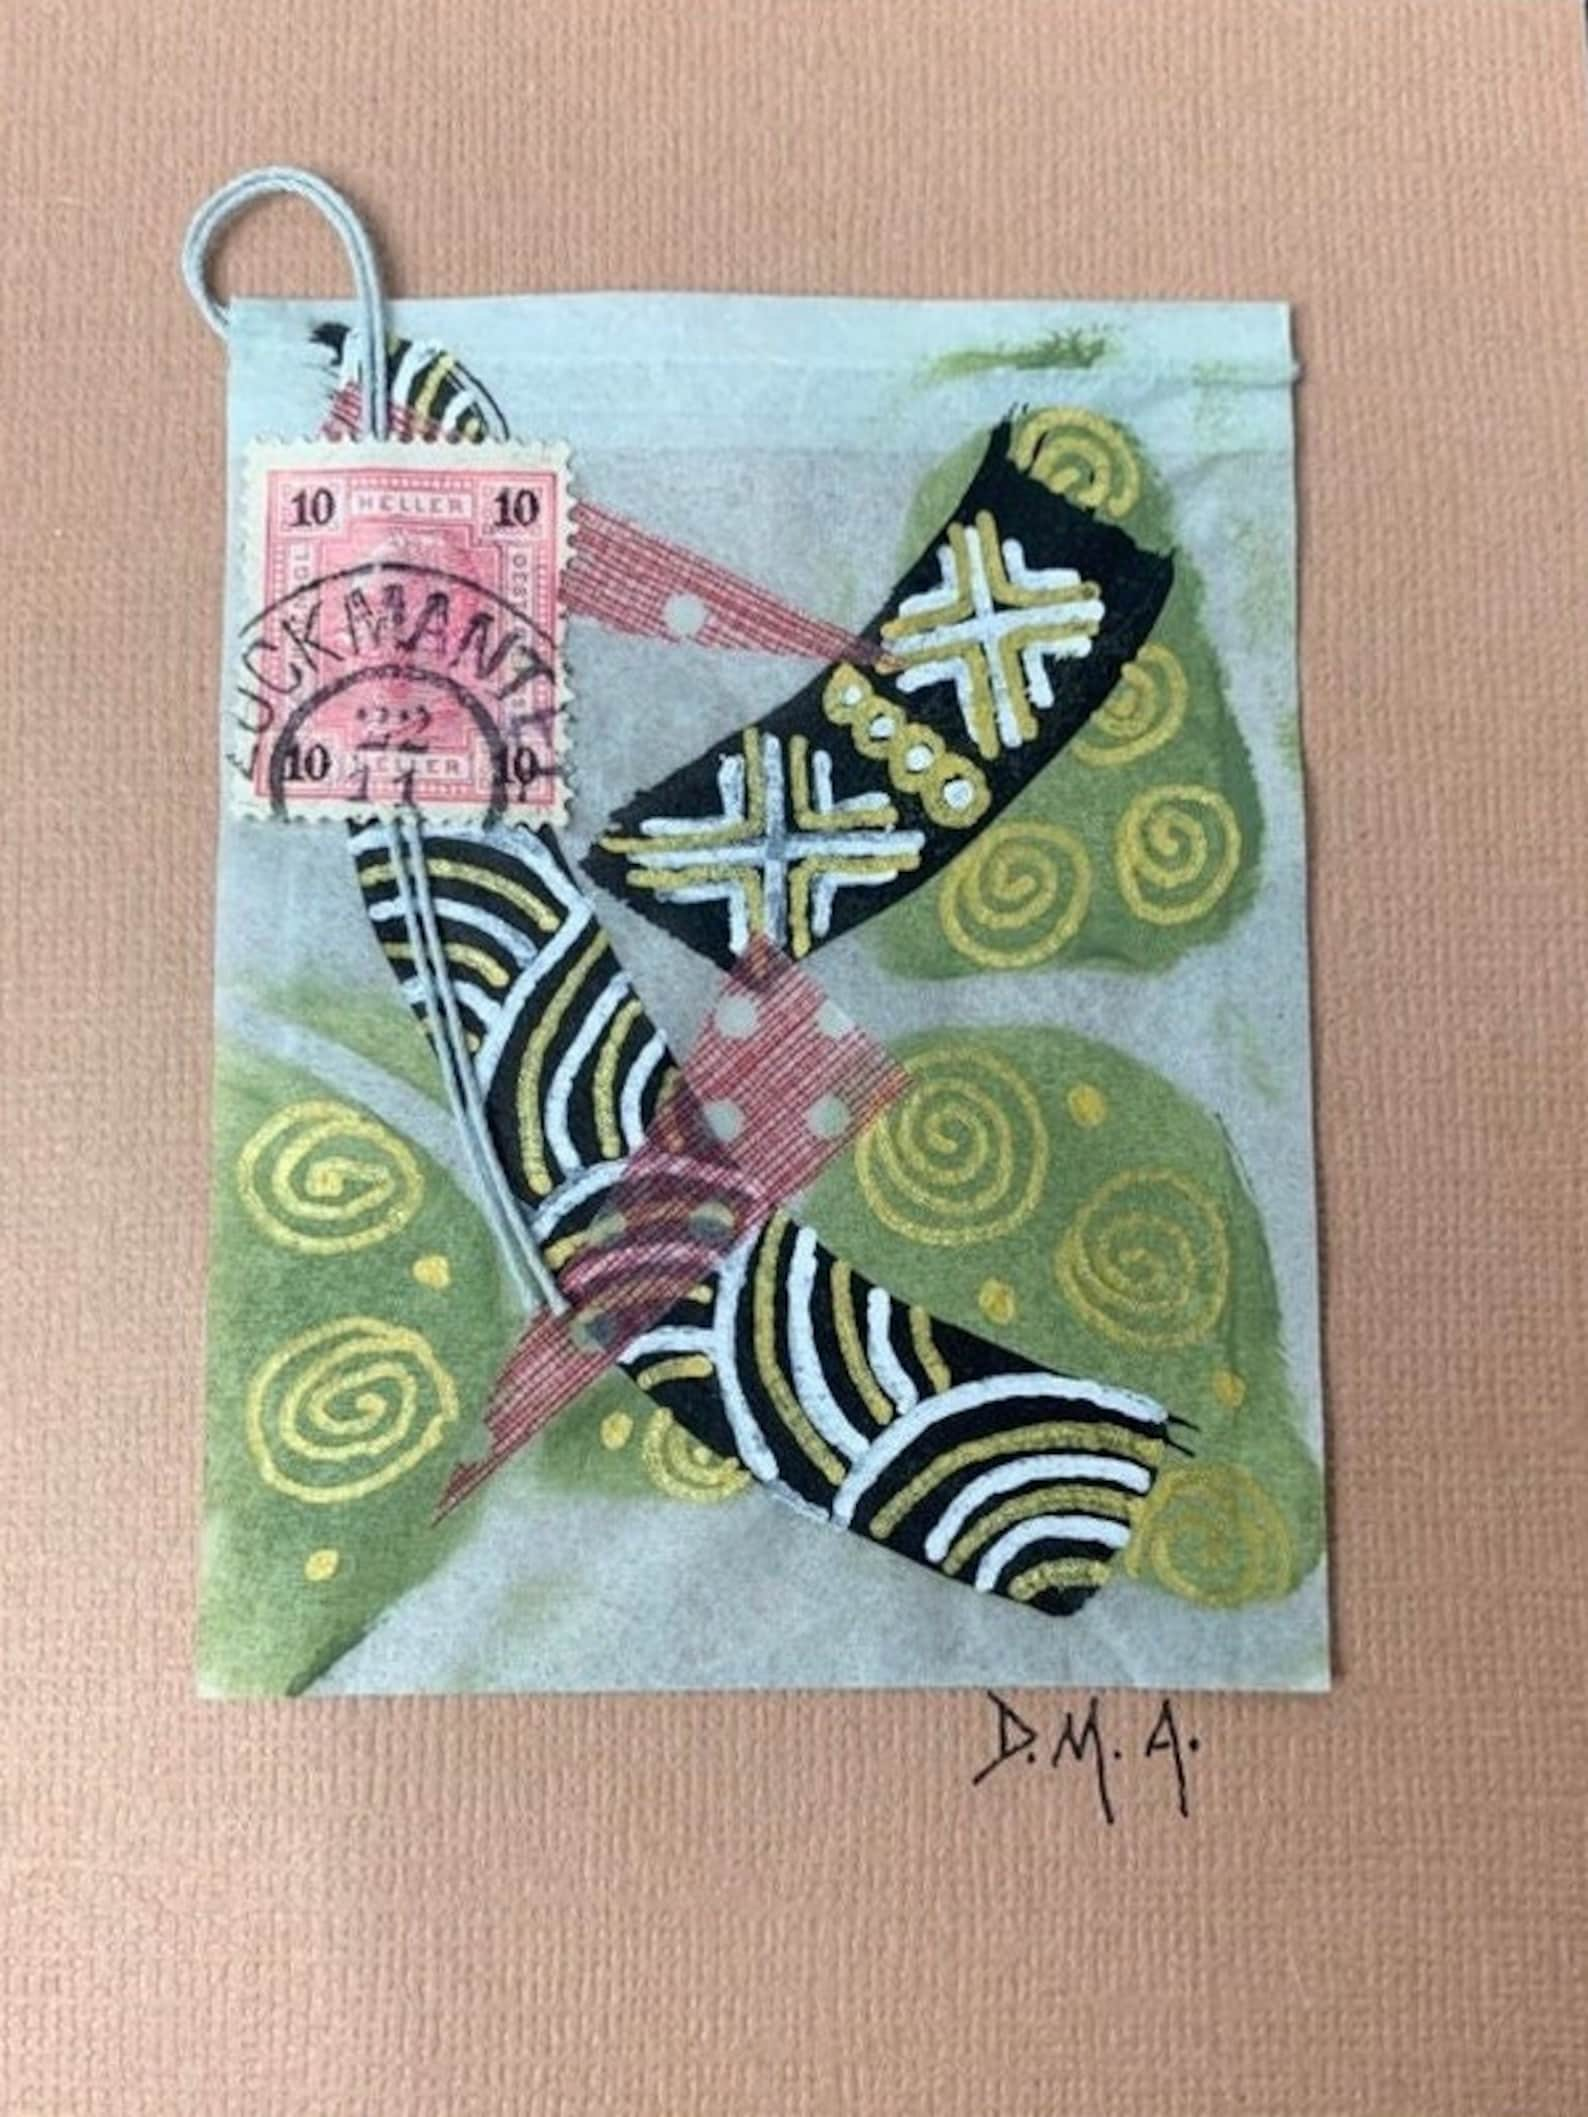
Sample Work
Creating Tea Bags
Zine Template [PDF]
Project Considerations
Artwork should be placed mainly only on one side of the Zine paper. See Zine Template.
Use Cardstock, Artagain or Drawing paper for the Zine Booklets.
You may use any combination of the materials and techniques implemented this semester.
The design must be NON-OBJECTIVE.
The design should aim to establish a dynamic and unified composition that establish a focal point, visual flow, and adhere to the rule of thirds.
Use new or used teabags. Make sure they are dry if used.
You are creating two sets of artworks. Each has one Zine Booklet and three tea bags.
Any text used can be hand drawn, but you can also use some kind of stamped, printed, photo, typed, or collage method.
Explore different materials and techniques like sewing, collage, painting, etc.
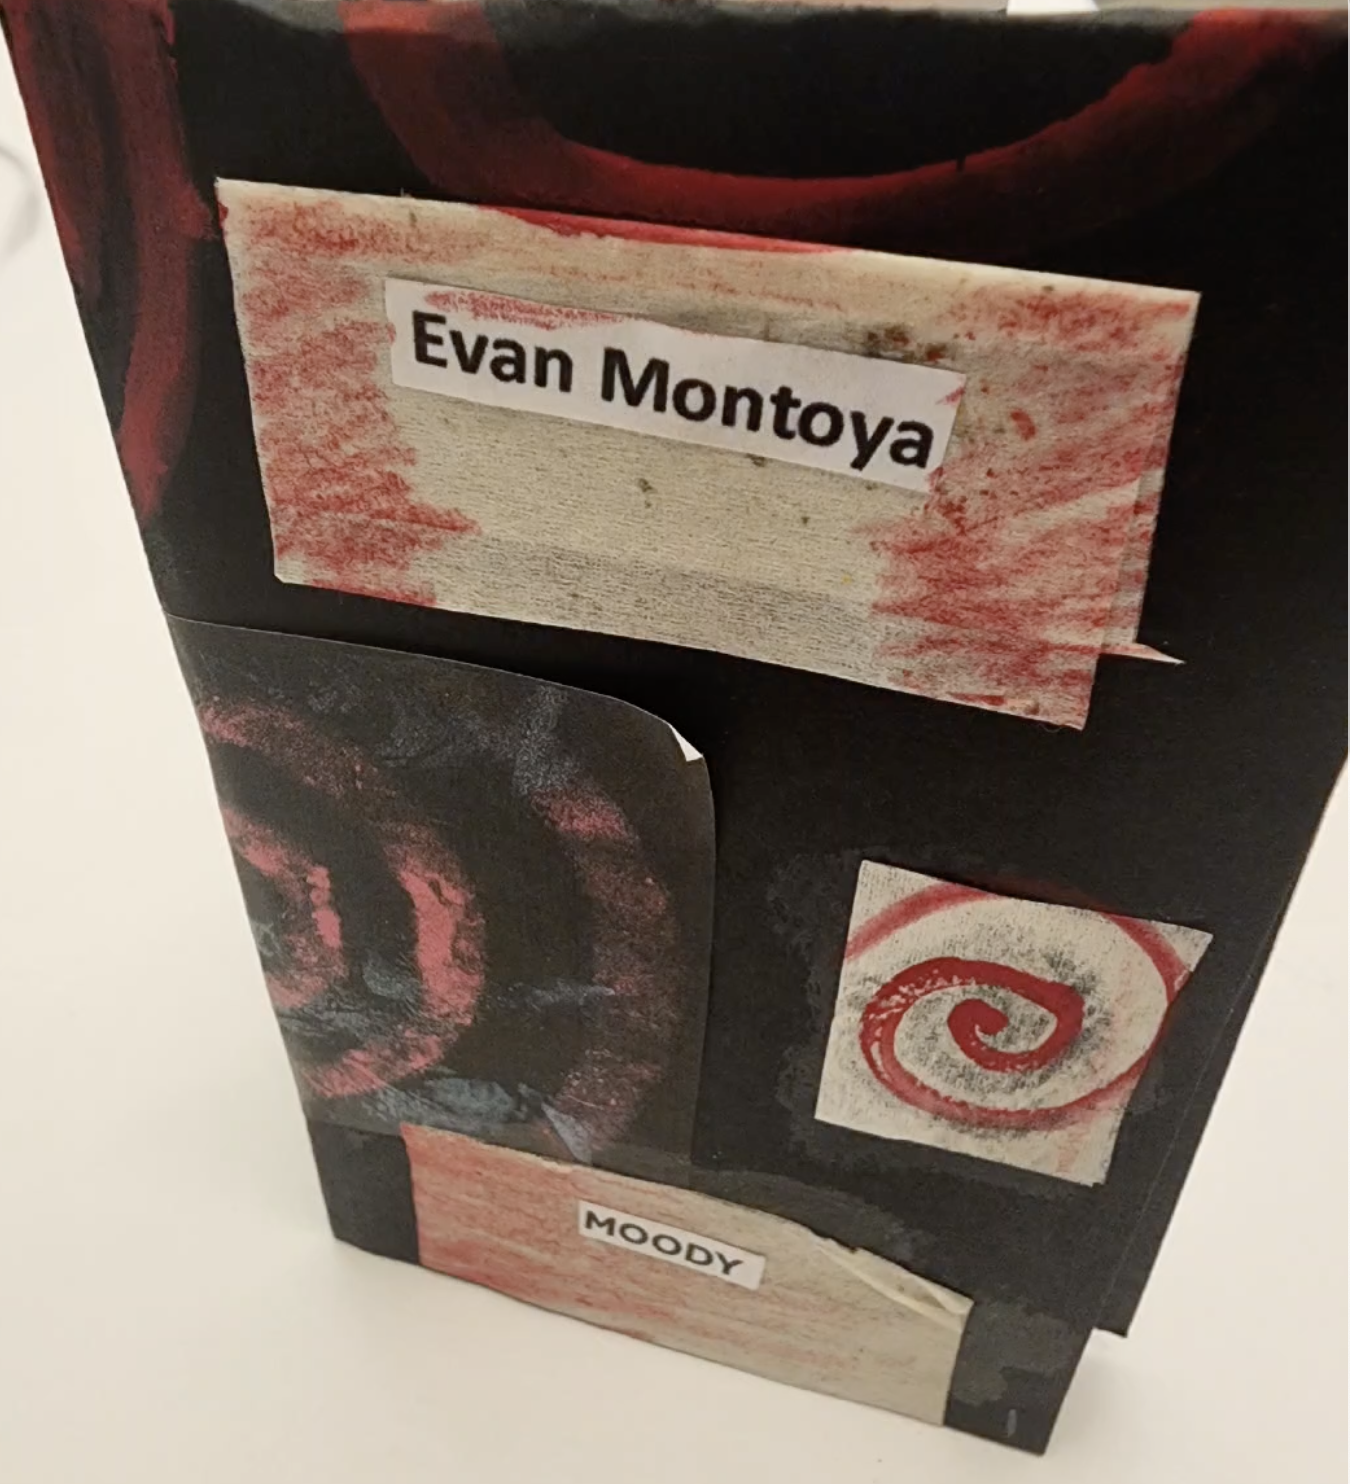
Front page must include a one (1) or two (2) word title and your name. Text can be hand drawn, or written in some kind of stamped, printed, photo, typed, or collage method. The title should indicate something about the contents of the zine. Up to 2 additional pages may use similar text if desired.
Step-by-step Directions:
Note that you should photograph your process from the beginning. Each step should have at least four photographs showing your process.
Part A: Preparing tea Bags
Step 1 : Collect and prepare at least four (4) tea bags. Create your own tea bag using this template for creating Tea Bags. Set them aside.
Part B: Preparing Zine
Step 2 : Prepare the two (2) Zine Booklets. Use drawing or Artgain paper using the template to divide your paper into 8 sections, be sure to always take note of the correct order and orientation of your pages. Lightly pencil in the page numbers following this Final Project: Zine Template [PDF]. Set them aside.
Part C: Planning Your Designs
Step 3 : Choose one (1) adjective from the list below to serve as your overarching concept and to help guide your narrative and design decisions.
Adventurous
Affectionate
Aggressive
Cautious
Controlled
Confident
Dainty
Delicate
Elegant
Mad
Moody
Playful
Step 4 : Choose one (1) shape to be the common element – “the star” – of your zine and tea bags. With each page and/or tea bag, you will take this shape through some kind of transition or journey. Think of the narrative as a day in the life of your shape.
Write down the name of the shape. You will have to commit to this shape and share it with your Prof. and classmates.
Step 5 : Your zine and tea bags will use the formal elements – Line, Shape, Space, Texture, Value, Color and maybe Type – and design principles – Balance, Emphasis and Focal Point, Rhythm & Movement, Scale & Proportion, Unity – as tools to help create a non-objective narrative.
The formal elements will help establish a “mood” for your zine and tea bags.
Study each of the elements' characteristics so they can best communicate the content/mood you want to convey.
What sort of shapes and textures communicate a humorous tone versus a serious or solemn tone?
What types of lines are fast versus still? Would you use high or low contrast for something dramatic versus something quiet?
Jot down some characteristics for each of the below formal elements that would best suit your concept.
Line: __________________________________________________________________________________
Shape:_________________________________________________________________________________
Value: _________________________________________________________________________________
Texture: ______________________________________________________________________________
Color: (black and white is okay!) ___________________________________________________
Space: _________________________________________________________________________________
Step 6 : Choose at least one (1) design principle and strategy from each of the following columns that best fit the concept of your zine and tea bags. These are just to get you started, you may use any number of strategies discussed throughout the semester.
Closure
Compressed/Expanded Space
Continuation
Contrast
Directional Dominance
Figure/Ground Reversal
Implied Line
Linear Perspective
Repetition
Size
Overlapping
Step 7 : Thumbnail Sketches | In your sketchbook jot down what is going to happen (the basic narrative) for pages 1-8.
Note Page one is your cover. The cover must include a one (1) or two (2) word title and your name. Text can be hand drawn or you can use some kind of stamped, printed, photo, typed, or collage method. The title should indicate something about
the contents of the zine and tea bags.
Step 8 : Draw a thumbnail sketch for each page of the zine and tea bags. Next to each thumbnail, write the materials you intend to use.
Part D:
Step 9 : Review your thumbnail sketches and completed pages with 2 classmates. Ask each other the following:
• Which pages most successfully depict your intended concept?
• Are all of the project guidelines adhered to?
• Ask for suggestions on how you may strengthen the overall zine to support your intended concept.
Step 10 : Make any needed adjustments after your peer review and complete all pages of your zines and tea bags.
Step 11 :Make sure you process is documented in film or photos.
Delivery Brightspace Submission & Written Statement
Both the image & the writing assignment should be uploaded to Brightspace by the middle of last class.
Once you complete the project:
PHOTOGRAPH or SCAN your two (2) sets of zine with three (3) tea bags at 300ppi and upload it to Brightspace Project 9.
- Submit one image file for each of your zine's: Front, each inside full spread, and back along with the final written statement.
- Each page should be submitted as a separate .jpeg file.
- The assignment is graded on completion of assignment and quality of photos. Refer to Photographing Artwork.
- Title your image files as Name_zine_page#.jpeg (example: Jacques_zine_1).
Refer to the project's guidelines and vocab words to help you with proper use of the vocabulary.
Answer each of the following in full sentences (type and save in Word before submitting to Blackboard):
The text should have no less than 200 words and no more than 600 words
- What is the concept of your design? List the adjective that you chose and how you interpreted it.
- Describe which shape you used and what the basic narrative of the zines and tea bags is (what happens from one page to another).
- How did you use the formal elements (line, shape, value, color, texture, space) to help communicate the overall concept?
- Which Design Principles and strategies did you utilize and how did they help communicate the overall concept and narrative?
- What accessibility aspect did you observe? How did you addressed it?
- What are the most successful and unsuccessful aspects of your zine? What would specifically rework if you had 1 more week?
Project Grading Criteria
Final Project is Worth 15 points
Design:
Editions Craftsmanship (up to 2 pts):
Have the two set of final zines and 3 tea bags each been executed in a professional manner? Do they all have eight (8) completed pages related to three tea bags?
Do both set of editions utilize the designated materials with care, effort, and attention to detail?Technique and Accessibility (up to 2 pts):
Do the zines and tea bags demonstrate a command of both design materials, techniques and accessibility? Are the two sets of Zine and Tea Bags properly photographed as a set and uploaded o Brightspace? Are the Zines photographed opened and individual pages?Elements of Design (up to 2 pts):
Are the elements of design and their characteristics well researched, well chosen, and designed? Is the “star” shape apparent in all pages? Are implied lines, high and low value contrast, figure/ground value reversal, concave and convex shapes, shaped value gradation or shaped texture utilized effectively?Composition and Principles of Organization (up to 2 pts):
Do the elements of design in zines and tea bags demonstrate understanding of the principles of organization: Unity (continuation, repetition, alignment, proximity), Emphasis and Focal Point (contrast, isolation, convergence, uniqueness, placement), Movement (changes in direction and values, repetition, overlapping, similar shapes connected to each other), Balance (asymmetrical) ?Form & Content (up to 2 pts):
Is your concept evident in the final zines and tea bags?
Self-Critique:
Uploaded Written Statement (self-critique) to Brightspace (up to 1 pt)
Vocabulary (up to 1 pt)
Analysis (up to 1 pt )
Read Written Statement in Class (up to 1 pt)
Presented Zines & Tea bags in class (and shared one edition with with Prof. Jacques - in-person classes only) (up to 1 pt)
Each bullet point will be graded on the following scale:
- 2 points: Exceeds Standards
- 1.7 points: Meets Standards
- 1.4 points: Approaches Standards
- 1.1 points: Does Not Meet Standards
- 0 points: Did not complete
Extra Credit Opportunity:
Submit your process documentation (photographs of the different stages of your process of developing the project) in Powerpoint, PDF or Video along your final project to earn 10 more extra/bonus points.